How to Grow Mushrooms at Home: A Step-by-step Guide
**Legal & safety note: Only cultivate species that are legal where you live. Keep everything clean to reduce contamination; never attempt to grow illegal species.**
Growing mushrooms at home might seem intimidating at first, but once you learn the process, it’s surprisingly simple and rewarding. In this guide, I’ll walk you through my 11-step method for growing mushrooms in a tub. This was taught to me by Ashley, who has a summary video of all of this at the end! We’ll start from inoculation to harvest, with a few advanced mycology tips at the end if you want to keep the genetics going.
You don’t need a huge setup or a science lab to get started. In fact, you only need four basic things that I’m linking to trusted suppliers:
- Spores (or a liquid culture / agar culture)
- A pre-made grain spawn bag
- A bulk substrate
- A tub kit (or “monotub”)
Visual Learner? Watch Ashley’s Video First:
Step 1: Starting With a Spawn Bag
When your spawn bag arrives in the mail, the first thing to do is let it breathe. Take it out of the box, stand it upright, and release the filter patch (sometimes it sticks, and until you unstick it, no air can flow).
Let it sit for 24 to 48 hours at room temperature (70–72°F) before messing with it. This gives the bag a chance to puff up and also lets you see if any contamination shows up before inoculation.
A few tips:
- Always keep the filter facing up.
- Store the bag on a shelf, not the floor, and keep it out of direct sunlight.
- Avoid “all-in-one” bags. They sound convenient, but they’re slower and less nutritious. I always recommend all-grain bags instead.
Step 2: Inoculation — Introducing the Culture
This is the exciting part: adding life to the bag. There are three ways to inoculate a spawn bag:
- Spore syringe – shake the syringe to break up the spores, sterilize the bag and needle with 70% isopropyl alcohol (not 90%), then inject 3–5 cc into the bag through the injection port. Cover with micropore tape.
- Liquid culture syringe – same process as spores, but colonization is faster. I like to inject some liquid near the front of the bag so I can see growth quicker.
- Agar culture – for the more advanced grower. Using a sterile laminar flow hood, transfer a clean wedge of agar directly into the bag.
We’ll go over here the process for spore/liquid culture syringes (since it’s the same method). Whatever method you choose, sterility is everything. Here’s what I recommend:
- Work in a clean room with little to no foot traffic.
- Wipe down every surface, your clothes, and even your hands with 70% isopropyl.
- Let the dust settle for 30 minutes before inoculating.
- If you can, shower and put on clean clothes before starting.
It might feel over the top, but contamination is the #1 thing that ruins bags, so it’s worth the effort.
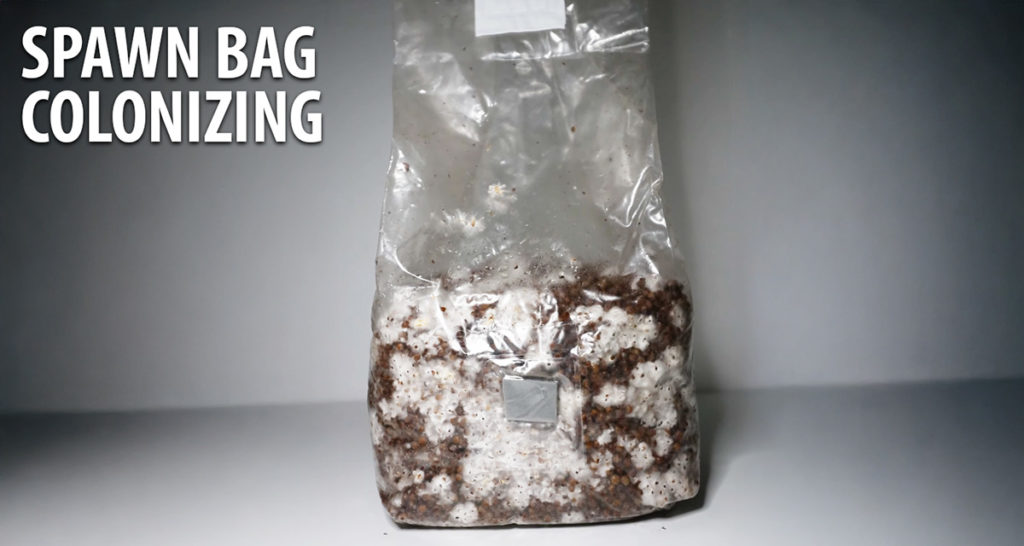
Step 3: Let It Colonize
Once the bag is inoculated, place it back on the shelf at 70–76°F. Now it’s just a waiting game.
- With spores, you’ll usually see growth in 10 to 20 days.
- With liquid culture, it’s faster: 7 to 15 days.
When the bag is about 10–30% colonized, give it a good break and shake. Break up the mycelium as much as possible and mix it evenly through the grain. This spreads the colonized sections and speeds up the process.
Over the next 1–3 weeks, the bag should turn fully white with mycelium. Once that happens, you’re ready to move on to the bulk stage.
Step 4: Making the Bulk Substrate
The substrate is the “soil” your mushrooms will fruit from, but unlike garden soil, it isn’t made of dirt. Instead, growers use a mix of coco coir, vermiculite, and gypsum because these ingredients create the perfect environment for mycelium. The coco coir acts as a clean, fibrous base that’s easy for the mycelium to spread through, while the vermiculite works like a sponge, holding water and releasing it slowly to keep moisture levels stable. The gypsum adds minerals like calcium and sulfur, helps maintain a balanced pH, and prevents the mix from clumping. Together, they make a moist, airy, and contamination-resistant “bed” that supports strong colonization and reliable fruiting, without the risks that come with regular soil. Here’s the recipe Ashley uses and can be purchased here (enough for two tubs):
- 500 g vermiculite
- 500 g coco coir
- 100 g gypsum
- 16 cups boiling water
Spray down a 5-gallon bucket with alcohol, add your dry ingredients, pour in the boiling water, and put the lid on tight. Let it sit for 24 hours. This process pasteurizes the mix, which means it kills off most bad organisms but keeps the beneficial ones that help mushrooms thrive.
Check the moisture by squeezing a handful. It should be damp, airy, and release only a few drops of water when squeezed. That’s “field capacity,” the sweet spot.
Step 5: Mixing Spawn and Bulk
Now comes the fun part. Thoroughly wipe down your tub, liner, and plugs with alcohol. Put the liner inside the tub. The liner helps reduce side pins and makes cleaning easier.
Next, break up your colonized spawn bag (if it’s started pinning inside the bag, that’s okay, just remove the pins before using). Pour the spawn into the tub, then mix it with your bulk substrate at about a 1:2 ratio (spawn:bulk).
Even distribution is key — the more evenly it’s mixed, the more even your colonization and fruiting will be. Lightly press down the mix so it’s firm but not compacted, then put the lid on.

Step 6: Colonizing the Tub
At this point, patience is your best friend. Keep the tub at 70°F and as sterile as possible. An air purifier in the room can help a lot.
Over the next 5–7 days, you should see the surface of the substrate turn white as the mycelium spreads. Some condensation on the walls is normal. Once the tub looks fully colonized, you’re ready to fruit.
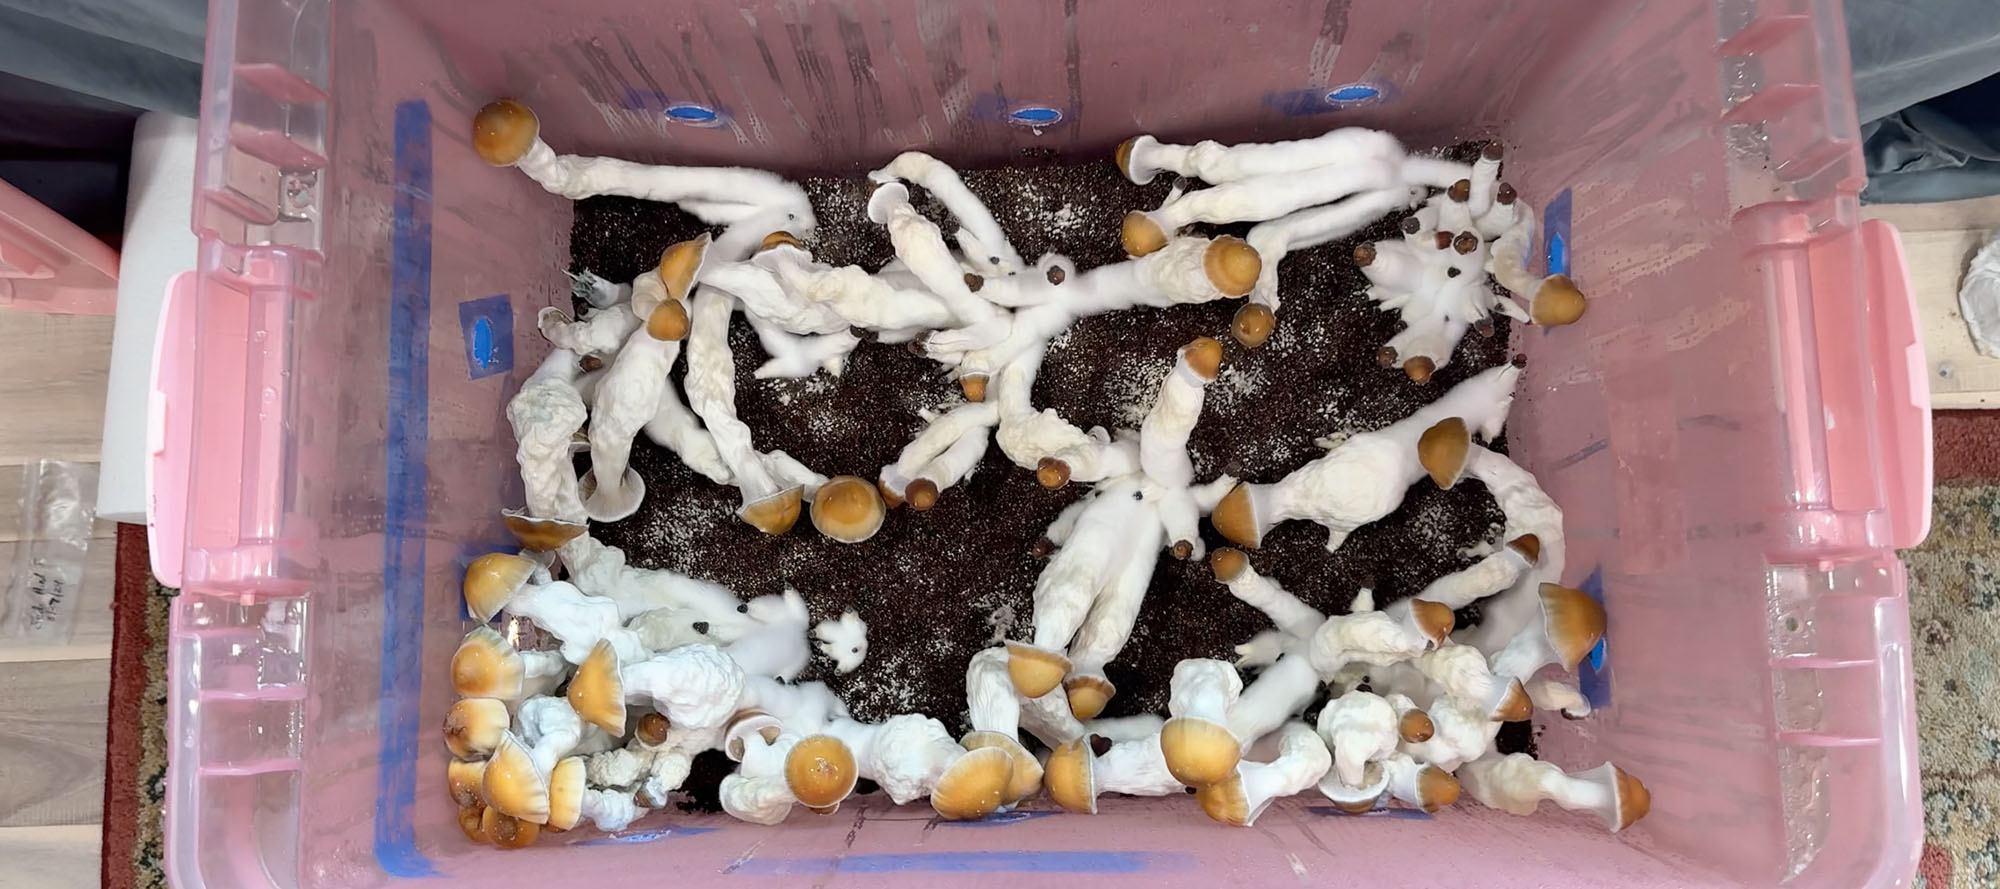
Step 7: Fruiting
This is where the magic really happens. To start the fruiting process:
- Replace the plugs with filters.
- Fan out the tub daily for 10 seconds to release CO₂ and bring in fresh air.
- Don’t mist directly — the tub should maintain its own humidity.
The stages you’ll notice:
- Exudate – little yellow or clear droplets.
- Hyphal knots – tiny white dots where mushrooms will form.
- Pins – baby mushrooms.
- Fruiting bodies – the mushrooms themselves.
This stage can take anywhere from 5–15 days, depending on the strain. Once pins show up, give them a little light (4–12 hours/day). Mushrooms don’t need much light, but it helps them grow in the right direction.
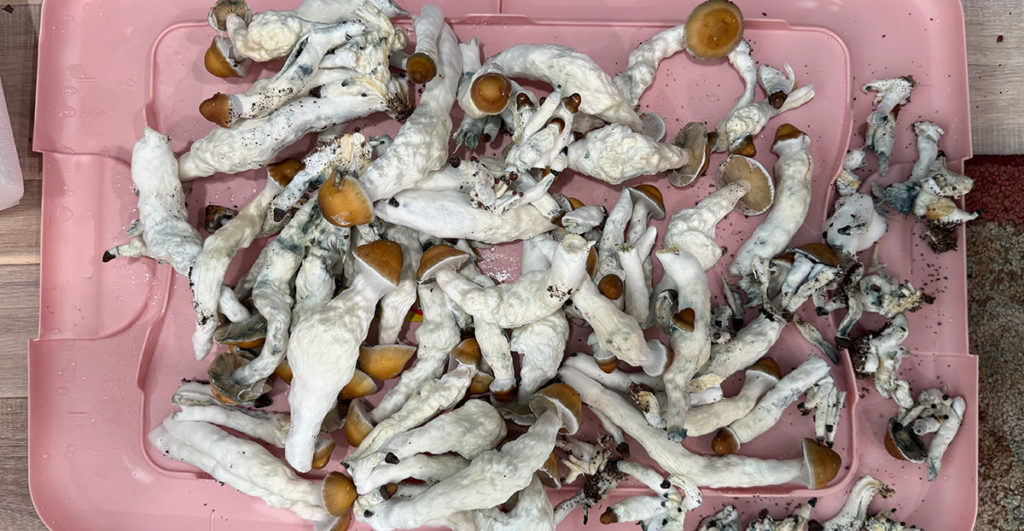
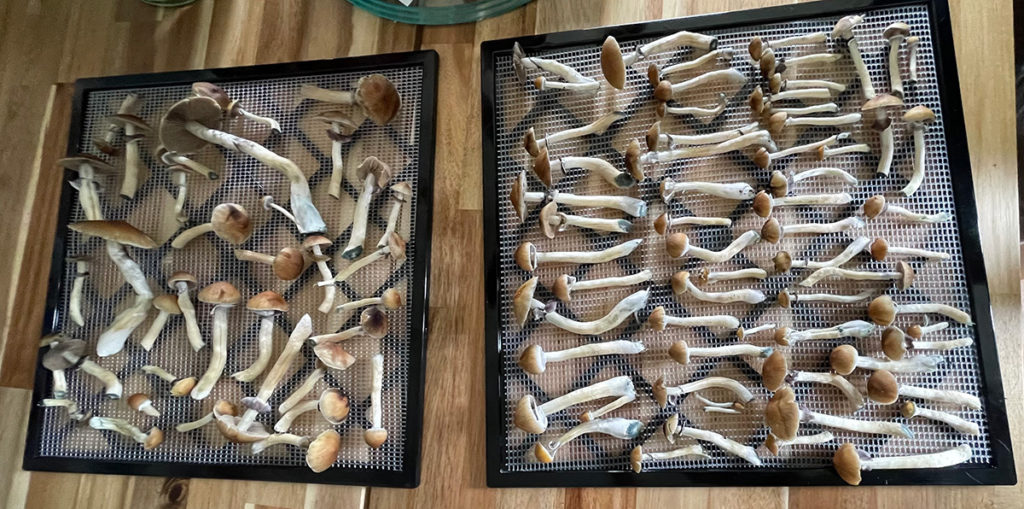
Step 8: Harvesting
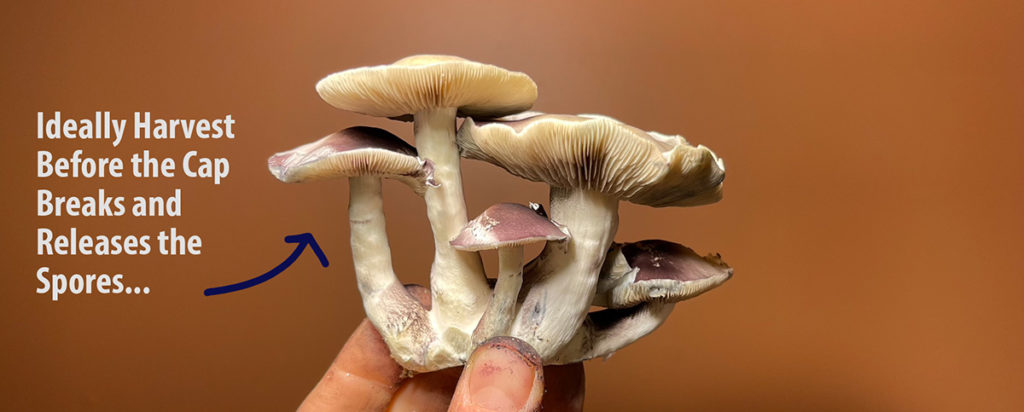
The best time to harvest is right before the veil breaks (that thin membrane under the cap). If you wait too long, the mushrooms will drop spores and won’t store as well.
A good method is to twist and pull gently from the base, being careful not to damage the substrate. Harvest the whole flush at once if possible, then lay the mushrooms on clean paper towels while you work.
Step 9: Drying
To preserve your harvest, drying is key. You can:
- Fan dry on paper towels for 2–7 days.
- Or use a food dehydrator on low heat until the mushrooms are completely dry (they should snap like a cracker).
Step 10: Storage
Once dry, store your mushrooms in an airtight container with a desiccant pack. Keep them in a cool, dark place, away from heat and moisture. Done right, they’ll last a long time without losing quality.
Step 11: Repeat with Advanced Techniques (Optional)
Once you’ve mastered the basics, you might want to preserve or expand your genetics. Here are three ways to do that:
- Cloning to agar: Take a piece from your best mushroom, place it on sterile agar, and let it grow. This saves the exact genetics.
- Making liquid culture (LC): Expand a clean clone into LC to easily inoculate more bags.
- Spore prints and swabs: Collect spores from a mature mushroom cap onto foil or a sterile swab. These can be stored for years.
Wrapping up and Summary Video
And that is the full cycle of mushroom growing in a tub, from inoculation to harvest. The first time might feel like a lot of steps, but once you’ve done it, it becomes second nature.
The following is a video that summarizes the process. I’ve had a few conversations with Ashley about this and I support her work by buying the products she sells. You can buy them anywhere, but she does make it very easy. The video below is actually an updated video of her original (that I shared above)